Home
Specifications
Videos
Photos
Practice
Wood Duck 10
Eastport Pram
Building PocketShip

Argie 10...

Even before PocketShip was in my sights, I ordered the plans for  an Argie 10  from Dudley Dix around 2007. I figured it would be a good "practice" boat.

It was finally started in summer of 2010. Sheets of plywood were laid out and the lines were transferred from the plans onto the wood. This is called lofting. The pieces were cut out and stacked. Instead of butt joints, I lengthened the pieces and joined them with scarf joints. It didn't look like a boat yet.

Next the two pieces that form the bottom of the hull were stitched together. Then the sides were stitched to the bottom, and the transom was added. It wouldn't float yet, but it finally actually looked like a boat! Of course, there was still lots of work to be done. The bulkheads and dagger-board trunk were added. I decided to tack it together first and remove the wire stitches before applying fillets of thickened epoxy. Glass tape was placed on all of the fillets. A penny was placed on the keel for good luck

Ready to apply epoxy / graphite coat to bottom, Sept 30 2010

Practice in Ganges Harbour, May 28 2012.


The 3/8" Douglas Fir plywood that I used instead of the 1/4" that the plans called for made it a bit heavier. Being Douglas Fir plywood instead of Okoume, I glassed both sides to prevent later checking. This all made it a bit heavier than it otherwise would have been, but it was a practice boat. 
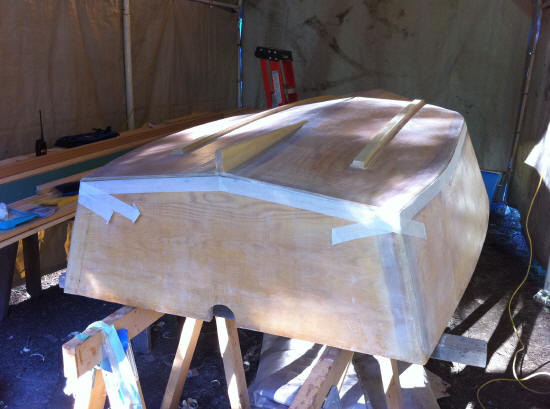
The completed hull was still just 127 pounds.

For the sheer strakes (rub rails) I used cedar. I managed to find an absolutely clear knot free 10' piece of edge grain 2x6. It was ripped into pieces about 1/4" thick. It wasn't long enough to reach from stem to stern in one piece, so scarf joints were used. I laminated three layers in place, one at a time. Because the pieces were slippery when coated with epoxy, the edges weren't perfectly aligned when clamped together, so when the epoxy was cured, the top was planed and sanded to level it out. After the edges were rounded off, I applied glass. Other woods may be tougher, but with a layer of glass cloth, it should be more than able to stand up to normal wear and tear.

Another way would have been to do the scarf joints first and then laminate all three pieces in one go, using the shape of the hull so they would have the correct curve, but with them not yet permanently attached to the hull. When cured, they could have been taken off and run through a thickness planer and then glued to the hull.

The beveled pieces for the oar locks were a bit tricky, again because the pieces were slippery when coated with epoxy. I applied a layer of glass over the oar lock mounts too. They aren't gong anywhere unless someone hits them with a sledge hammer.

I should point out that not a single metal fastener was used in building the hull. To this point, the only metal on the boat was the bow eye and the bronze oar lock sockets and the screws holding the sockets in place. It is a true wood-epoxy composite boat. Everything is sealed with multiple coats of epoxy, and the plywood has glass cloth on both sides.

There are four floatation compartments. Any one of them would be enough to keep it afloat if the hull was entirely filled with water. The compartments all have deck plates, making them accessible for dry storage. I was hurrying trying to get the boat ready to use on a particular date and the deck plates were installed temporarily without caulking. It wasn't ready, but the boat was used for a year and a half before the caulking was done in spring of 2013. I had used stainless steel machine screws, washers and nuts to hold the deck plates in place. While the deck plates were removed for the caulking, I shortened the machine screws so they didn't stick out the back. It was very fiddly getting the washers and nuts in place. Next time around, I'll use a "doubler" behind the bulkhead and us bronze wood screws instead of machine screws and nuts. It will make for a lot faster installation. Sika Flex caulking was used behind the bow eye and the deck plates.

Lots had changed between when the boat was started and when it hit the water for the first time. My father had watched the boat taking shape, but didn't live to see it completed. The hull sat there from fall of 2010 until late summer the next year when I finally got back to it and started working on it again. While not yet complete, it slid off the trailer into the water at Blackburn Lake late in the day on October 19 2011. It was officially named Practice when it first got wet. The name came from it being referred to as a "practice boat" while it was being built. While it was a practice boat, it turned out very nice and I learned a lot while building it.

The second outing was also to Blackburn Lake. The next was on Cusheon Lake. The fourth voyage was in Fulford Harbour. There was a return trip and circumnavigation of Cusheon Lake. The next launch was from Bader Beach and into Booth Canal, but fast flowing water as it approached low tide didn't allow going very far into it. There was a repeat visit to Cusheon Lake. Next stop was Long Harbour, and a circumnavigation of the lagoon, and then another visit to Fulford Harbour. With almost glassy water, the next outing was to Wallace Island in Trincomali Channel. The next was back to Fulford Harbour and all of the way out to Russell Island, followed by yet another visit to Fulford Harbour but with lots of wind and big waves. The next trip was in Ganges Harbour, with stops at Price Beach and Third Sister Island. This was followed by another visit to Russell Island. The next trip was somewhat epic... from Bader Beach over to Grave Point on Vancouver with lots of wind. This really added to the distance covered and the effort needed. Then it was back to Ganges Harbour and a pleasant trip about half way out on the east side of the harbour. The return trip was equally pleasant until I came out from behind Goat Island and had to head into a very strong wind for crossing to the other side. Six months went by until the next outing on New Year's Day 2013. I went from Price Beach to Beddis Beach. It was dark before I got to Batt Rock. That's 17 trips to date, all powered by $2 oars. Making some that are a bit longer and lot prettier is on the "to do" list, as is varnishing the rub rail, installing the mast step, finishing the rudder and dagger board and getting it ready for sailing. On July 24 2013, Practice moved inside the garage for the first time. No more excuses... it is time for a final sanding and to get some varnish on the rub rail. I have some Interlux Schooner, but plan on using Le Tonkinois in the future. More to come!

back to top  ]